Over the years, Bartenders have been featured in many written articles. In late 2001, Dave Burright received his Nov/Dec issue of WoodenBoat magazine and saw that the cover photo showed a beautiful 26' Bartender skimming along the water of Washington's Puget Sound. Intrigued by the looks of this magnificent boat, he immediately turned to the feature article that told the story of George Calkins and the legendary boats he had designed.
Burright had just recently completed the construction of a 19' Tracy O'Brien designed outboard fishing boat and wasn't ready for a new project, but the WoodenBoat photograph and story just wouldn't leave his mind. Finally in 2003 he decided that a Bartender was calling him and so he and his wife drove from Oregon to Washington where they met Mr. Calkins and his wonderful wife, Wilma, and purchased a set of building plans for the 26' cruising hull.
It wasn't until October of 2005 that Burright was able to actually start construction. Over the course of the next 6-1/2 years he spent countless hours in his well equipped shop, and many thousands of dollars meticulously building this extraordinary vessel. Each phase of construction was carefully photographed and shared on a Flickr.com website and has had over 30,000 views. https://www.flickr.com/photos/bt-builder/sets/72157602408266604/ This documentation has proven invaluable and gives other builders (and potential buyers) a rare opportunity to "watch" the boat being built. Selected photos are shown in the slideshow at the bottom of this page.
Throughout construction, the many thousands of decisions on how to build and outfit the boat were decided with safety, performance and comfort being primary factors. Burright planned on using the boat to both cruise the northwest waters and fish offshore, and his goal was to create a boat that not only was safe, but that felt safe. The Bartender's proven design and the high quality materials, extreme attention to detail during the build, and premium electronics and other fittings served to achieve that goal.
Another goal realized during construction was to use proven methods and materials that would ensure the boat would stand up to the elements and enjoy a very long life. Framing is primarily Khaya (also known as African Mahogany) with White Oak in areas such as the stems. The hull is sheathed with the highest quality Okoume marine plywood and its outside is covered in 6 oz. fiberglass cloth. Fiberglass was also used in other high exposure or high wear areas such as the tops of the decks, cabin and cockpit hardtop. System III epoxy was used throughout, and all inside areas not covered by fiberglass were given 2-3 coats of epoxy as a sealant. Silicon bronze fasteners were used throughout the hull with stainless above the decks (stainless also used where appropriate on rubrails, etc).
The following is a much abbreviated and simplified description and photos of the construction process:
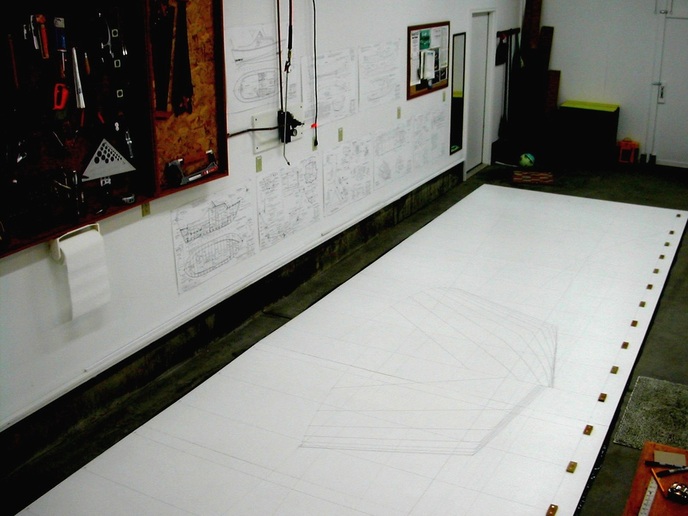
One of the first tasks was to loft the boat (draw it full size and exactly to scale) onto a lofting floor made up of painted plywood sheets. Dimensions were taken from the plans which are seen tacked to the shop wall. The completed lofting provided several perspectives and was referred to many times during the build.
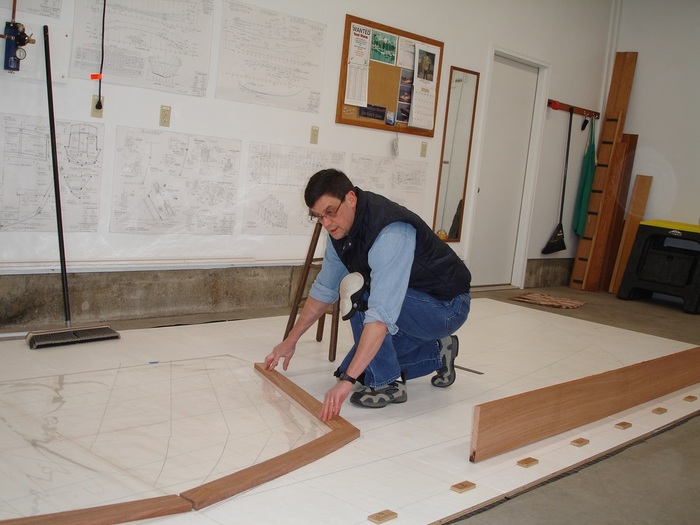
One of the many uses for the lofting drawings was to pick up the shape of the frames. Once the frame pieces were cut out they were assembled and epoxy coated.
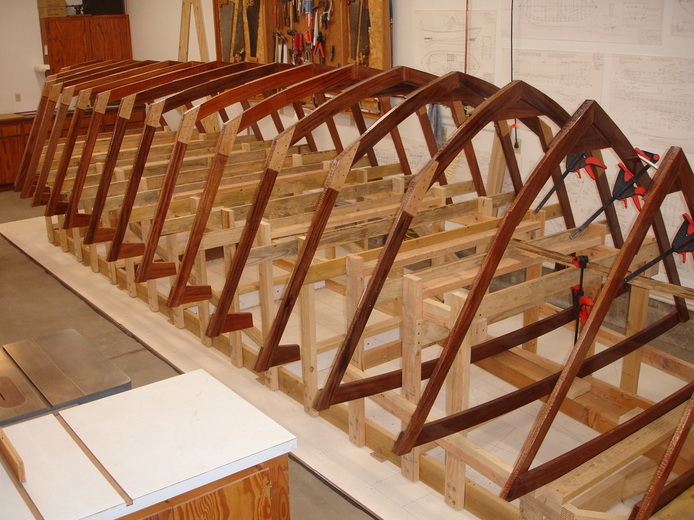
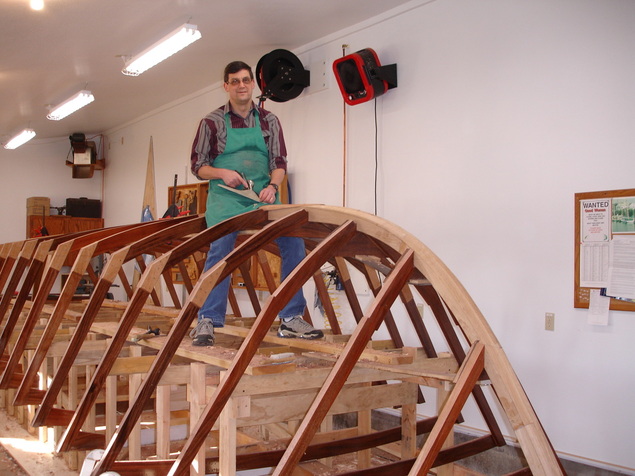
A building jig was then constructed out of standard building materials and the frames were carefully placed onto it. Precision was important, as a misstep here could throw the entire hull out of shape. The keelson, stems and chine logs all went on next, followed by a great deal of planing and fitting to make sure everything was fair.
Not shown are the photos of the large work parties that helped to attach the plywood to the sides. That process is somewhat like a fire drill because each of the frames must be first "buttered" with thickened epoxy that has a working life measured in minutes. During that time the epoxy must be spread and the plywood sides attached with several hundred bronze screws.
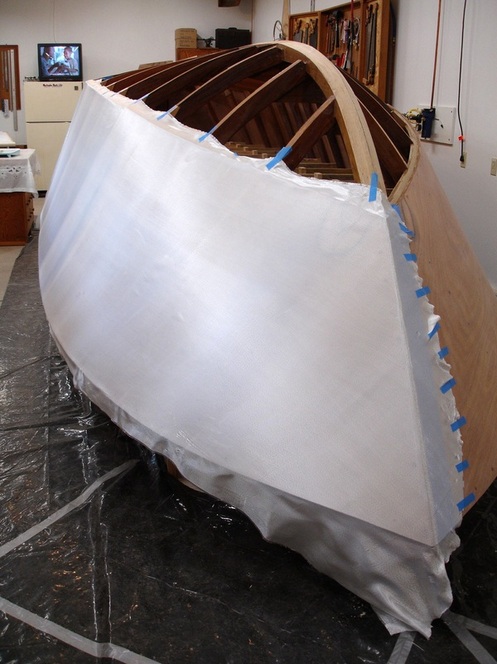
After the plywood was attached, the sides were draped with the fiberglass cloth and saturated with clear epoxy. Once saturated, the fiberglass turns clear. 3-4 more coats of epoxy were applied and then it was sanded out and faired to produce the smooth hull.
There were hundreds of hours spent sanding before the hull was pronounced, "Done"!
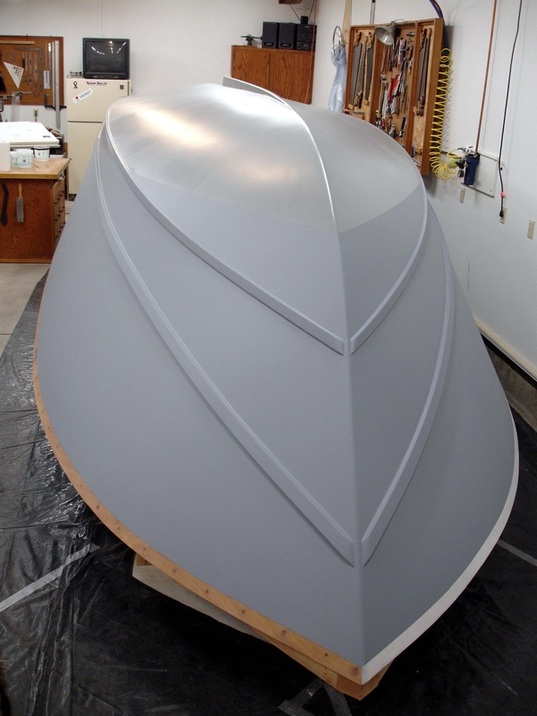
Here the bottom, keel, chine and spray rails are installed, the bottom was sheathed in fiberglass and was finish painted with an epoxy paint. The sides are painted with a coat of primer.
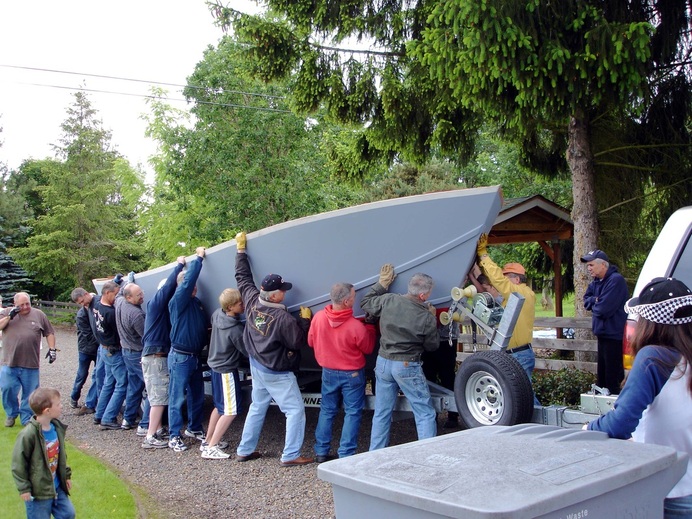
Flipping the hull and loading it on the trailer called for another party!
At this point the boat was approximately 1/3 completed and was eventually rolled back into the shop on its trailer.
At this point the boat was approximately 1/3 completed and was eventually rolled back into the shop on its trailer.
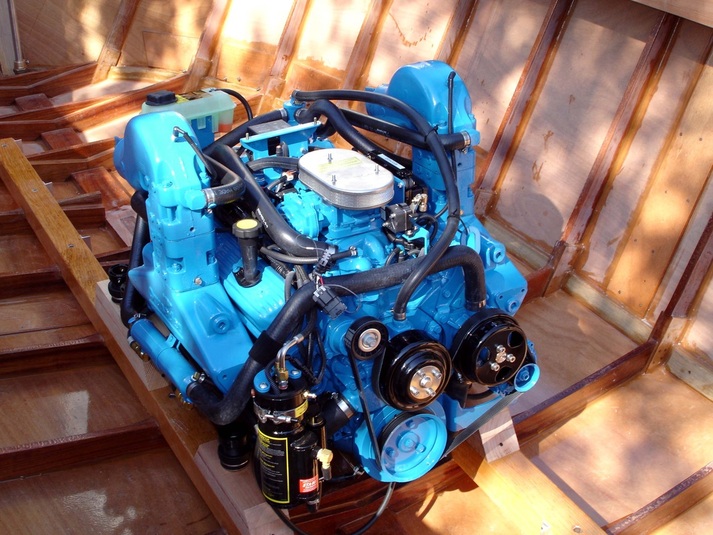
The Crusader 5.7L engine was purchased new from Cook Engine in Portland, Oregon. A forklift was used to lift it up and over the gunwales and down onto the engine logs (the two large timbers it's sitting on). The engine logs are old growth fir.
A steel A-frame hoist was used to move the engine and make minor adjustments inside the hull. It was specially built to fit in the shop and straddle the hull.
From here a great deal of time was spent building cockpit sole frames around the engine, installing the 2 custom made 60 gallon fuel tanks, installing the muffler system and a myriad of other components.
A great deal of thought went into the cockpit, cabin and helm layout. It was decided to expand the cockpit area, bring the wash sink and galley functions out into the open air and under the hardtop on deck, and reserve the cabin for a V-berth, port-a-potty and storage.
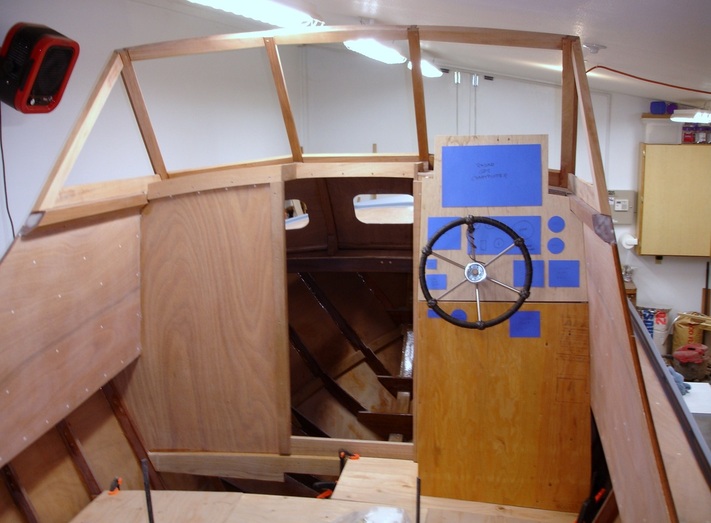
The helm was custom designed to be ergonomically pleasing and to fit the many displays and switches. This photo shows a mock-up out of scrap wood to test the layout. At this point the windshield framing is also in.
The helm was custom designed to be ergonomically pleasing and to fit the many displays and switches. This photo shows a mock-up out of scrap wood to test the layout. At this point the windshield framing is also in.
As work progressed inside, the outside of the hull was getting paint.
The cabin windows were custom built by a firm in Vancouver, Washington and they would go in later.
The cabin windows were custom built by a firm in Vancouver, Washington and they would go in later.
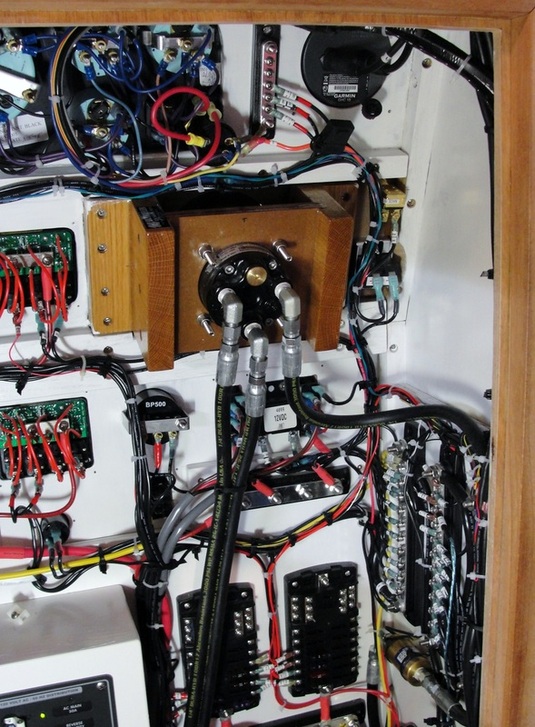
Meanwhile, back in the hull, hundreds of feet of marine grade tinned electrical wiring with marine connectors was being run and installed to all the electronics. At the point this photo was taken not all the wiring had yet been installed. Also shown are the hydraulic hoses that run to the helm. The AC shore power panel can barely be seen in the lower left corner.
Easy access to electrical panels is a challenge on many boats and so this panel was intentionally built into the back of the helm station with a large cabinet door accessing it from the cabin. All wiring is labeled and documented to ease maintenance.
A surveyor who inspected the boat for insurance purposes in 2011 was particularly complimentary of the professional grade wiring.
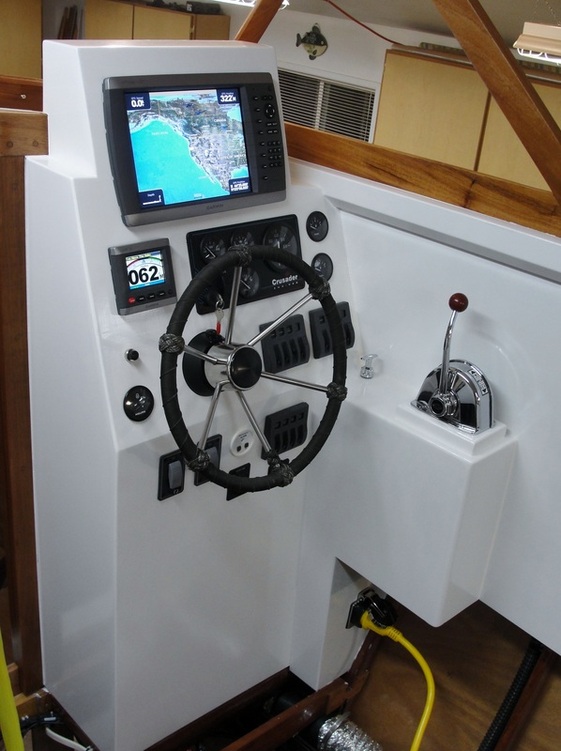
It was a highlight the first time the power was turned on and the boat came to life. The large color display is the 12" Garmin GPSMAP 4212 chartplotter, and the smaller one is the autopilot display.
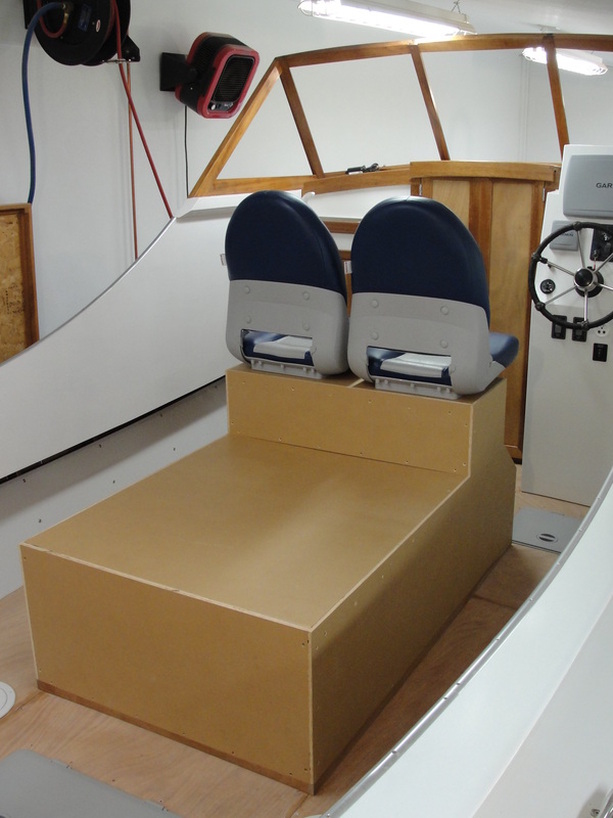
The engine cover box (doghouse) was constructed of 1/2" sign grade MDO and provides the base for the helm seats forward, and removable passenger swivel seats aft. Large hinges allow it to be tipped back for easy access to the engine, and the inside of the doghouse was covered with a sound absorbing material. A storage area is underneath the helm seats.
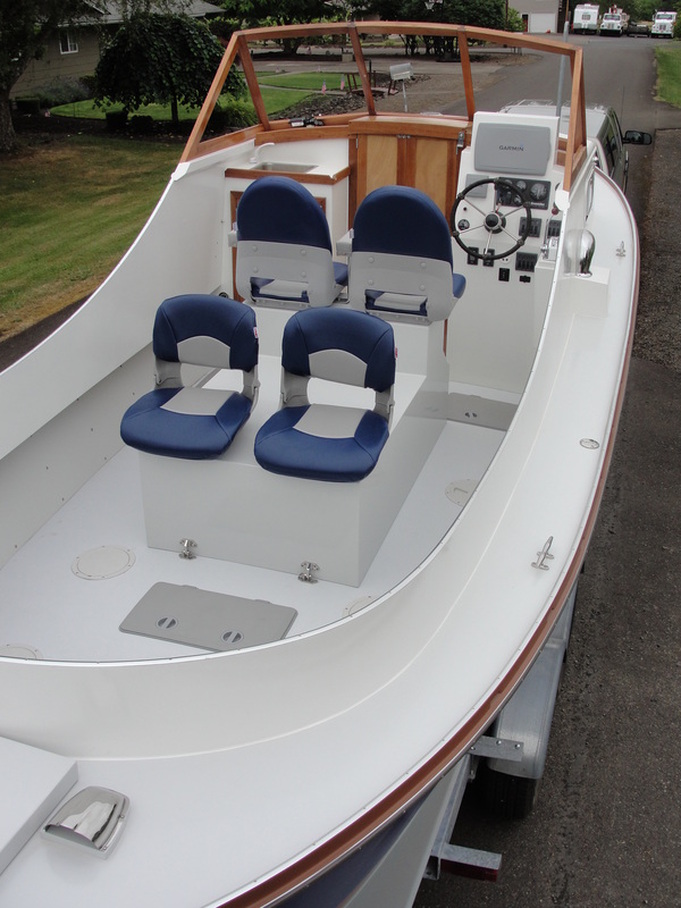
View of the self-bailing cockpit just prior to the first engine run and sea trial. The wash sink is on the port side just aft of the cabin bulkhead. A fold down counter and bracket for the propane gimballed cook stove was later installed on the cockpit wall aft of the sink. The hardtop, stainless cockpit railings and additional electronics were also installed later.

Sea trial - July 2011!
The boat was towed up to Cook Engine prior to the Crusader being started for the first time. Cook technicians checked the installation, declared it good to go and fired the engine.
The boat was taken for its first sea trial on the Columbia River near Portland. The boat ran perfectly and was then taken back to the shop to build the hardtop, railings, install the radar and finish inside the cabin.
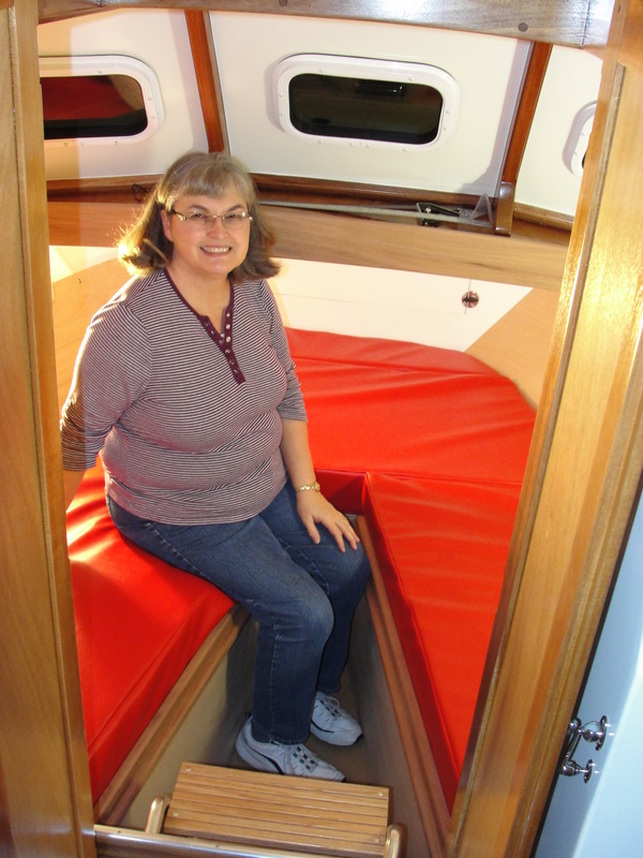
Cabinetry was built and cushions made inside the cabin. In addition to a V-berth, the entire cabin area can be set up as one large bed. The port-a-potty is stored under the steps.
One final task. On April 15, 2012, the boat was christened in front of a group of family and friends and named, "Kala Lua".
Swipe your mouse over the photo below and hit play to see a slide show of the entire build process.
